Shop Cutlery
Chef Curated Artisan Knives
Gifts To Cherish For Generations
Gift a slice of excellence to the culinary explorer or aspiring chef in your life with a top-tier knife or kitchen tool, expertly crafted to enhance their kitchen adventures.
All About Knives
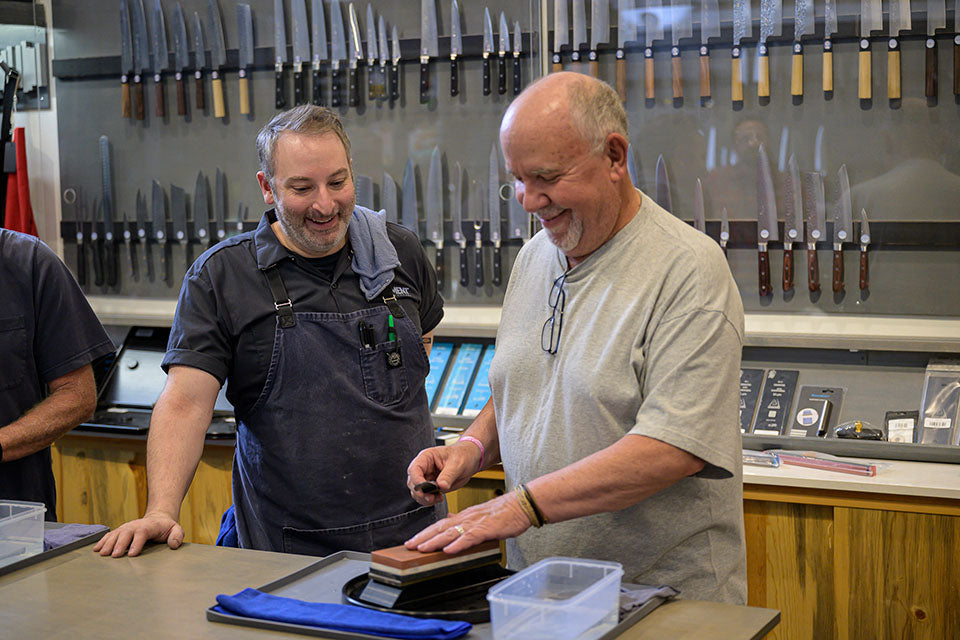
Learning Center
About Element Knife Company
Learn more about our story and how Chef Elan found his way to curating the best cutlery in the world.
All Purpose / Versatile
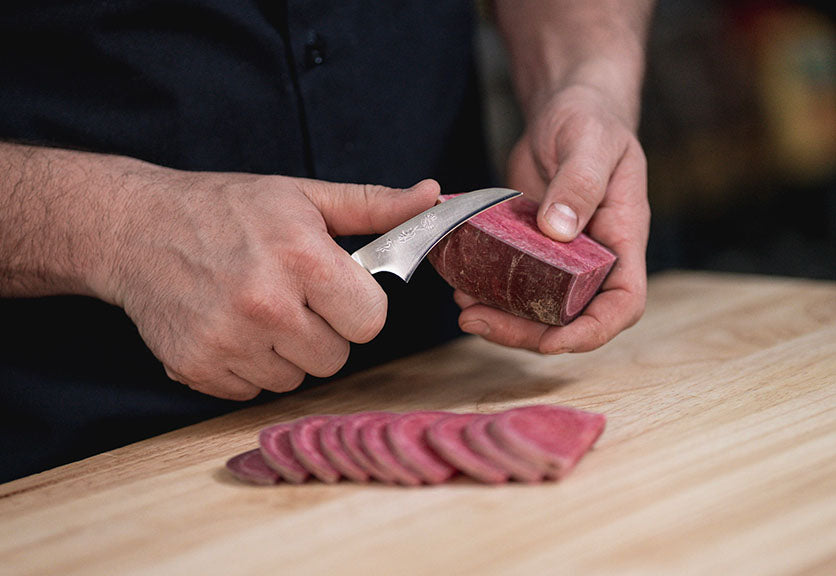
Vegetables
Small Tasks & Utility
Bread
Cheese & Tomato
Tableware
Slicing & Carving
Meat Butchery
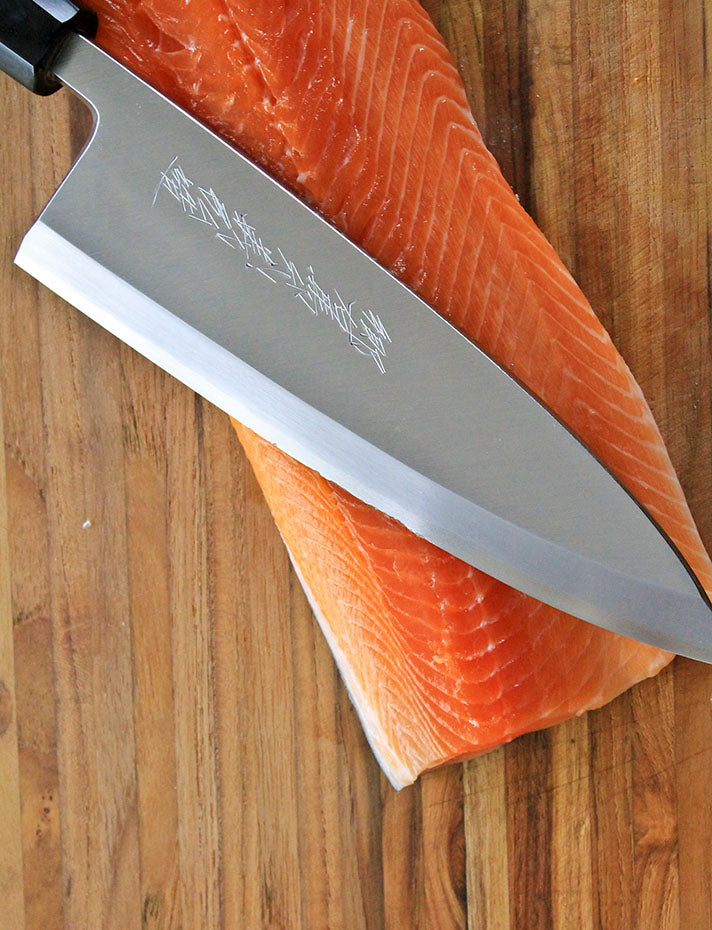
Fish Butchery
Pro Sushi Prep
Sushi At Home
Camping
Everyday Carry
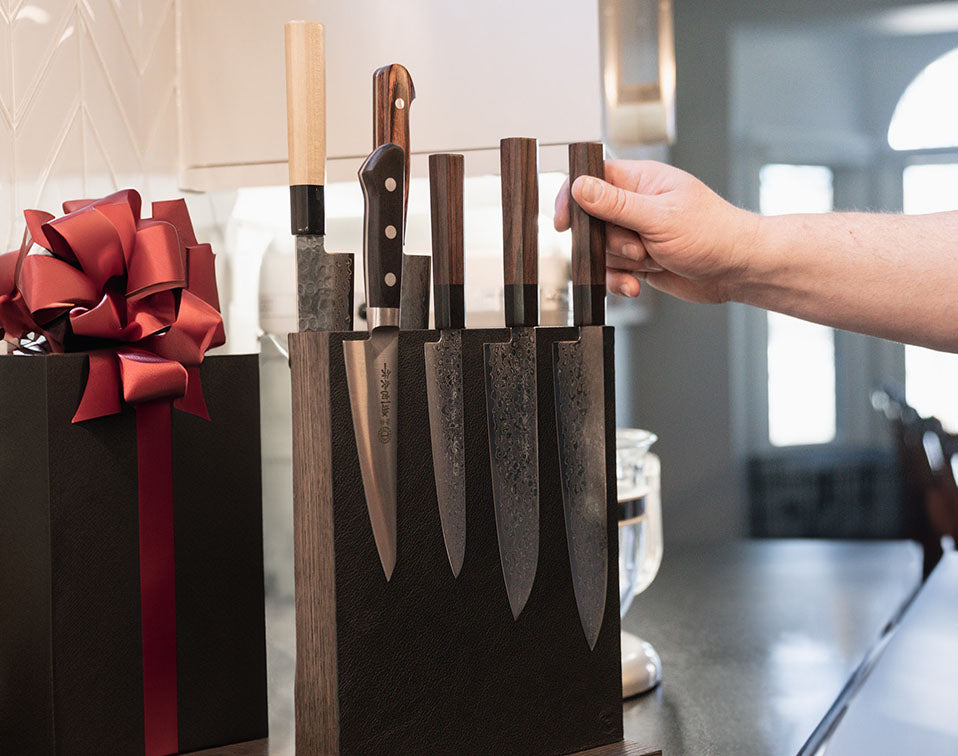
Knife Sets
All Knives
Gyuto & Chef Knife
Santoku & Bunka
Nakiri
Petty & Utility
Paring
Serrated
Cheese Knife
Slicing Knife
Steak Knives
Boning & Fillet
Meat Cleaver
Honesuki
Garasuki
Sujihiki
Funayuki
Yanagi
Takohiki
Fuguhiki
Kiritsuke
Usuba
Deba
Knife Sets
Glestain
Gohumanosuke Yoshihiro
Ittetsu
Kanekoma
Kasane Cutlery
Kikuichi Cutlery
Spyderco
Kyocera
Masutani Hamono
Motokyuuchi
Messermeister
Metalwork By Meola
Ryujin
Sakai Takayuki
Steelport Knife Co.
Sukenari
The James Brand
Touroku Sakai
Takeshi Saji
A. Stravers Cutlery
Tetsujin Knife Labo
Kato Hamono
Aaron Mills


Edge, & Blade Geometry Overview
Double-Bevel Blade Geometry
Offset Double-Bevel Blade Geometry
Double-Bevel Edge Geometry
Single-Bevel
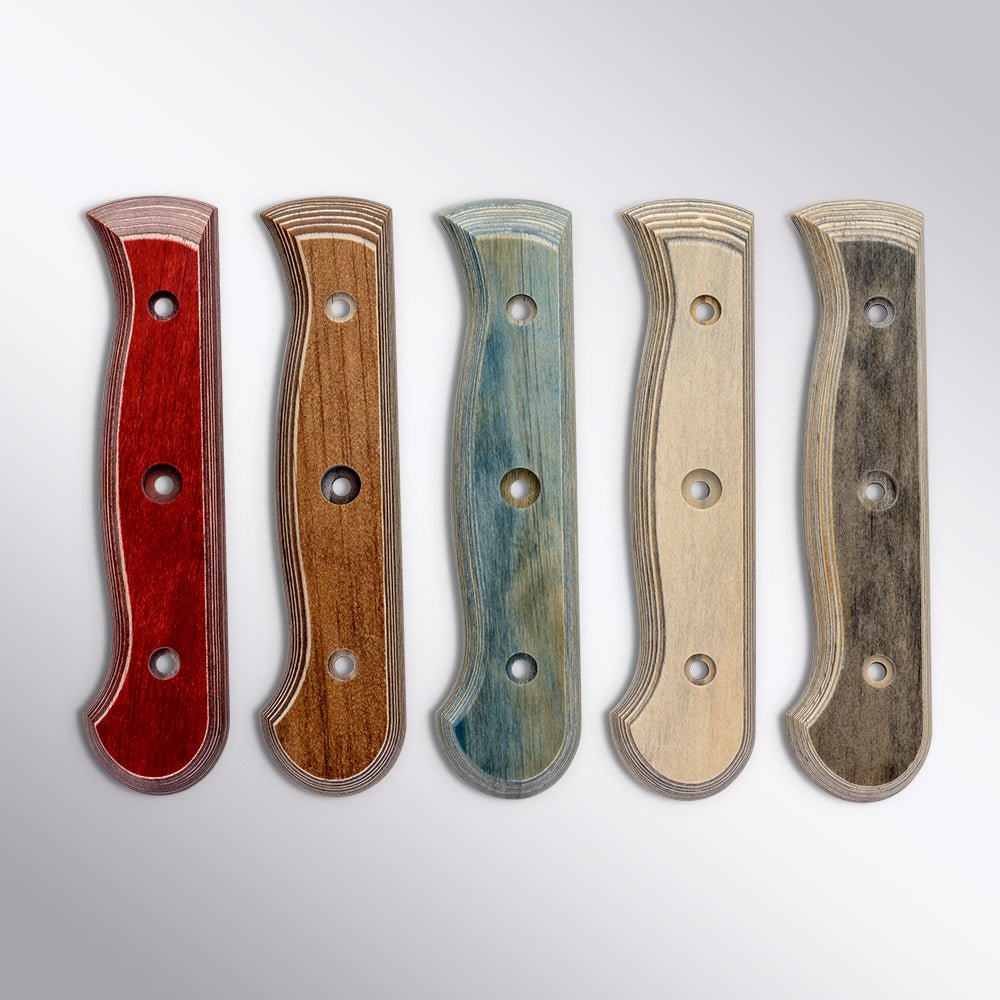
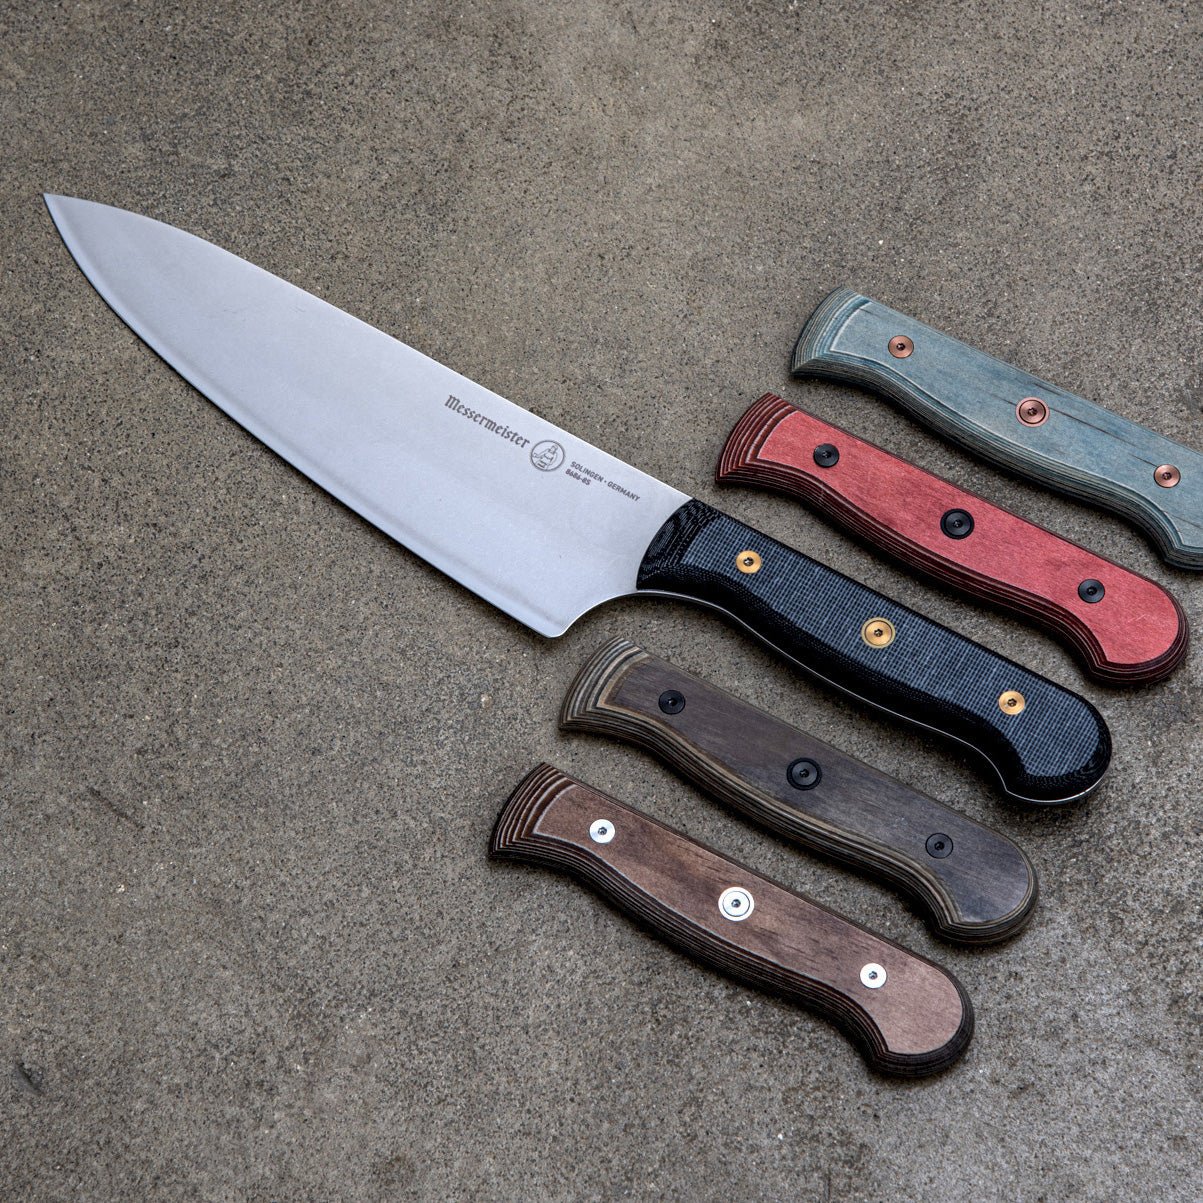
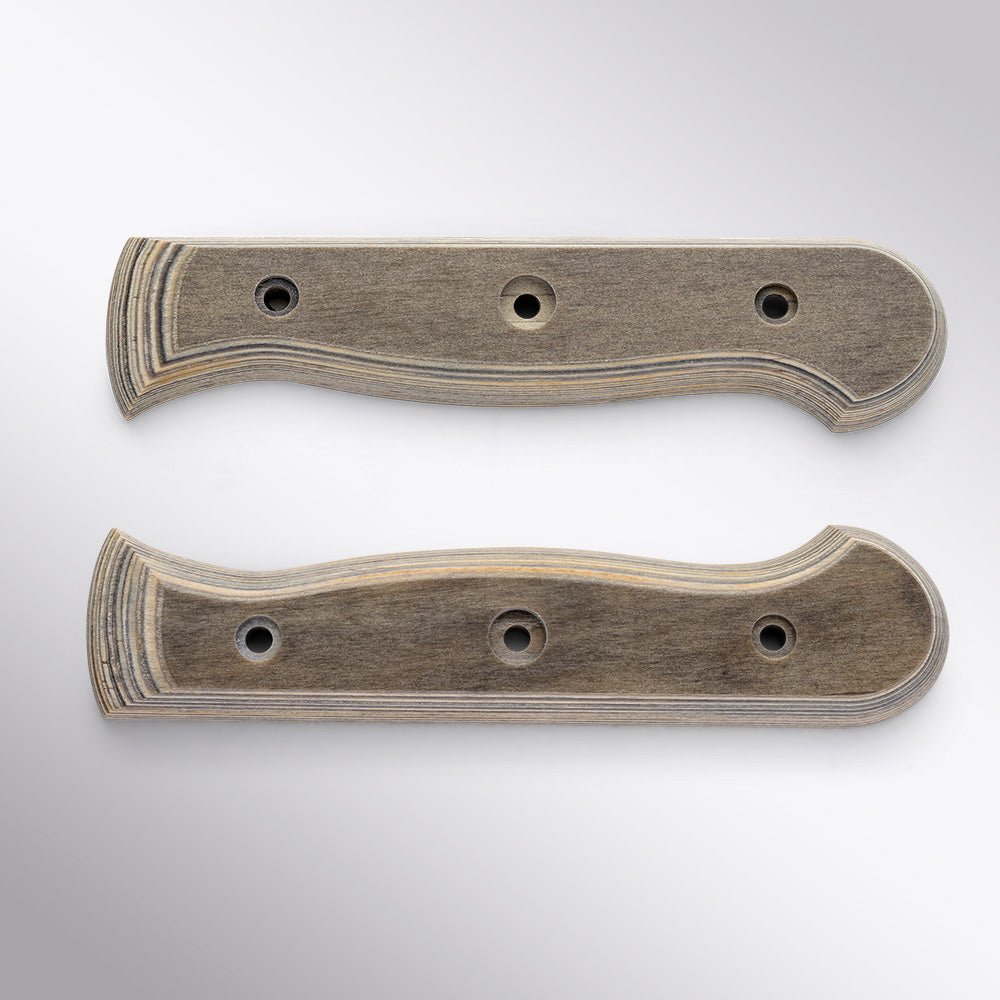
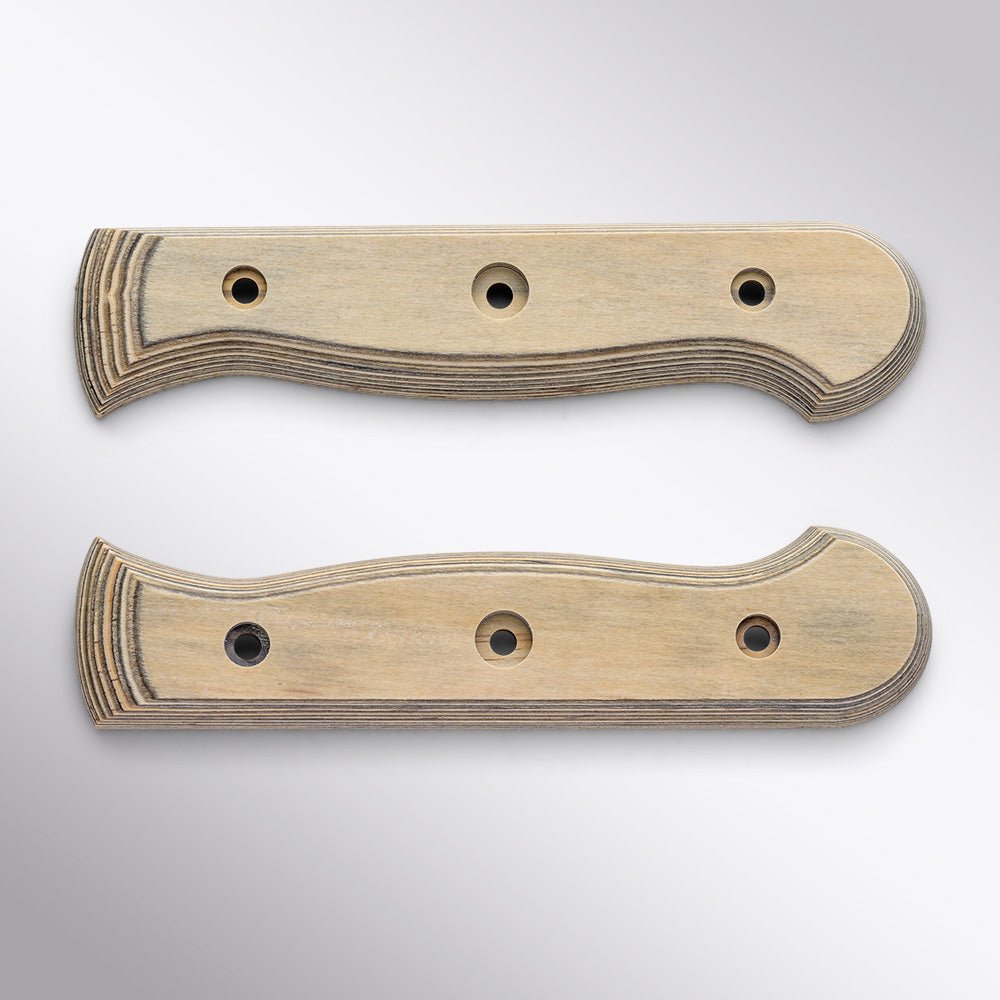
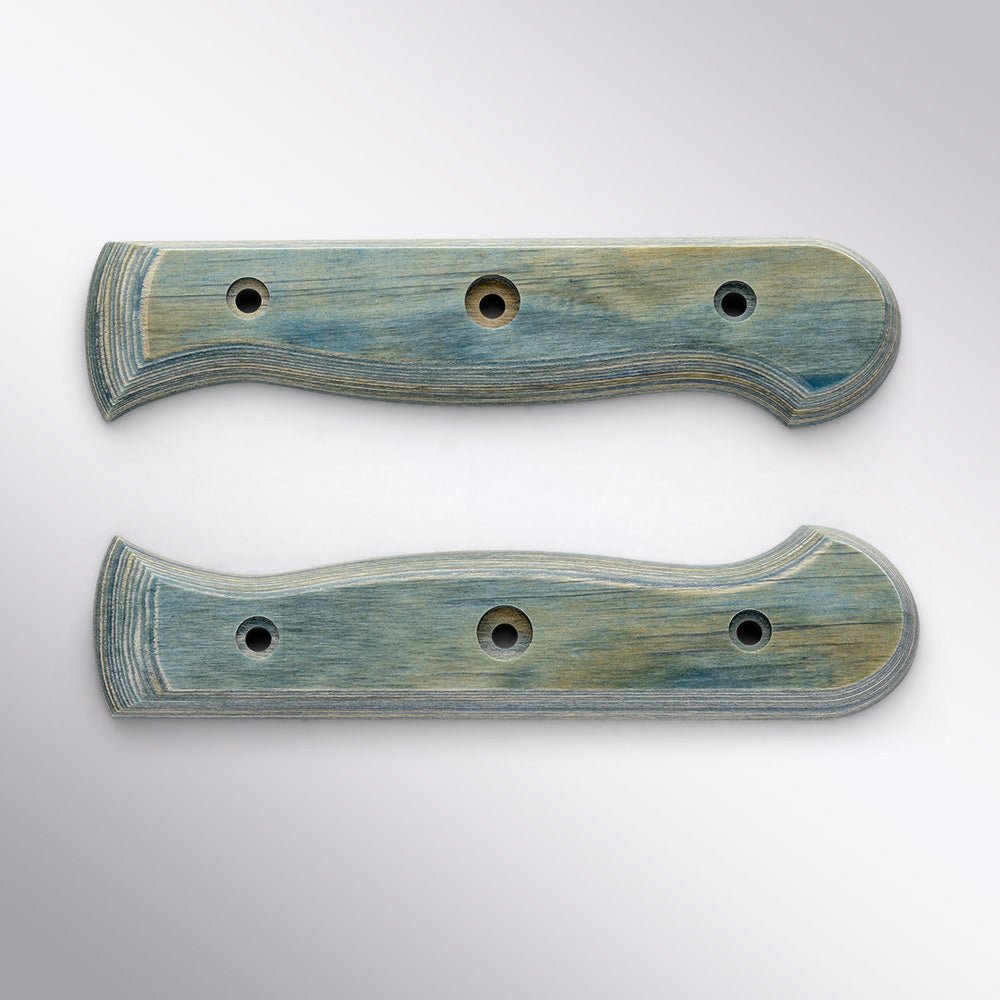

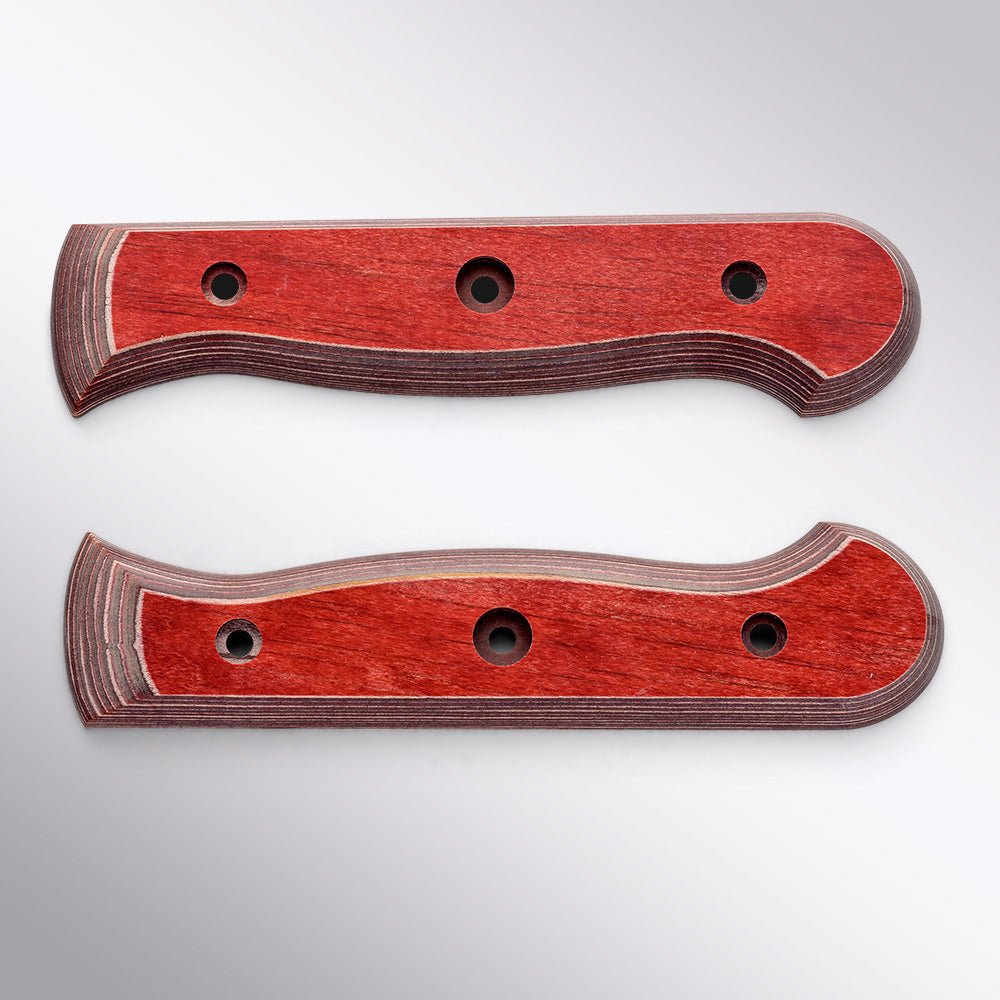
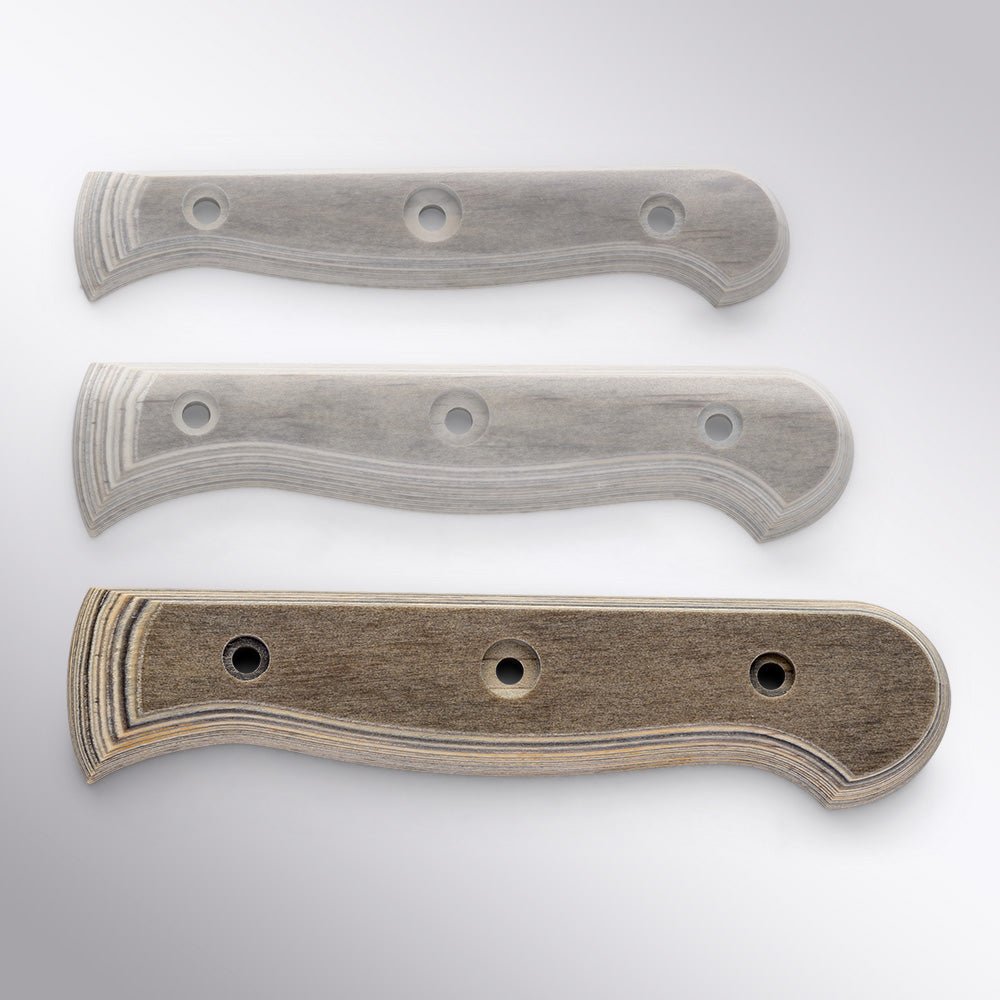
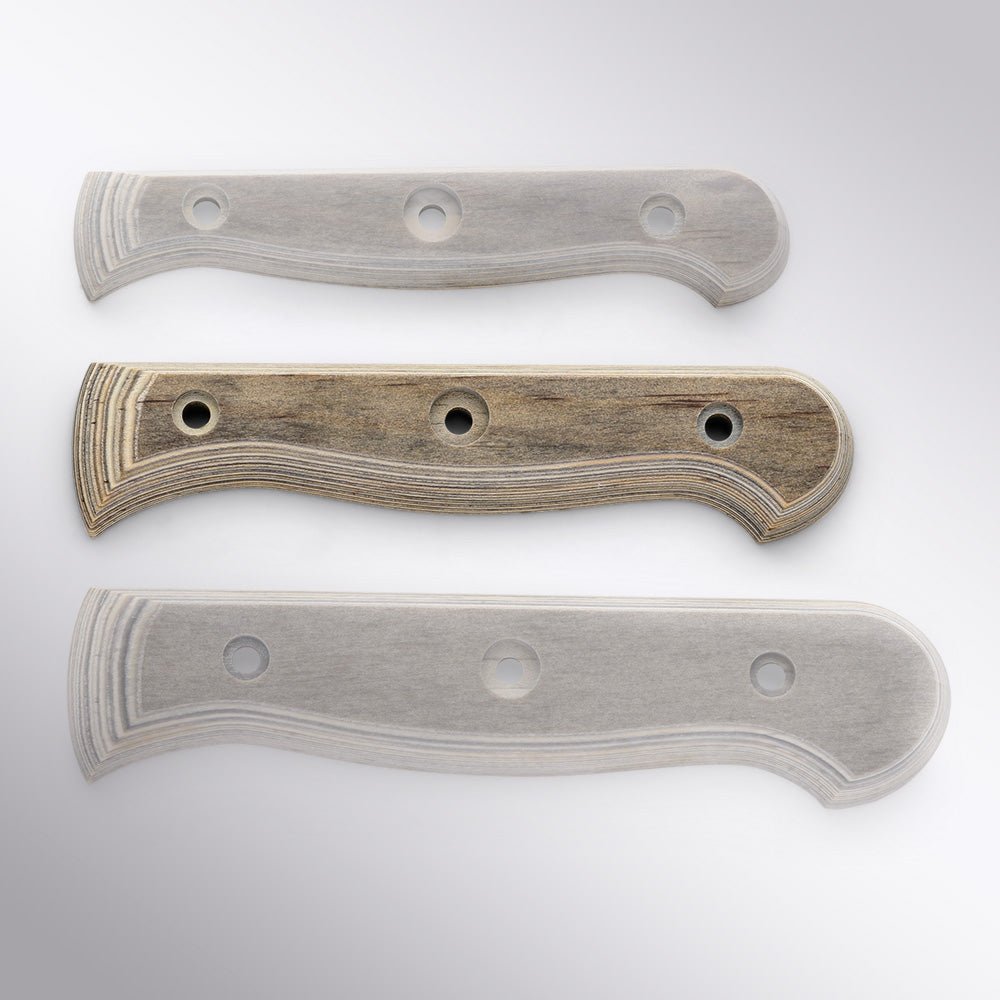
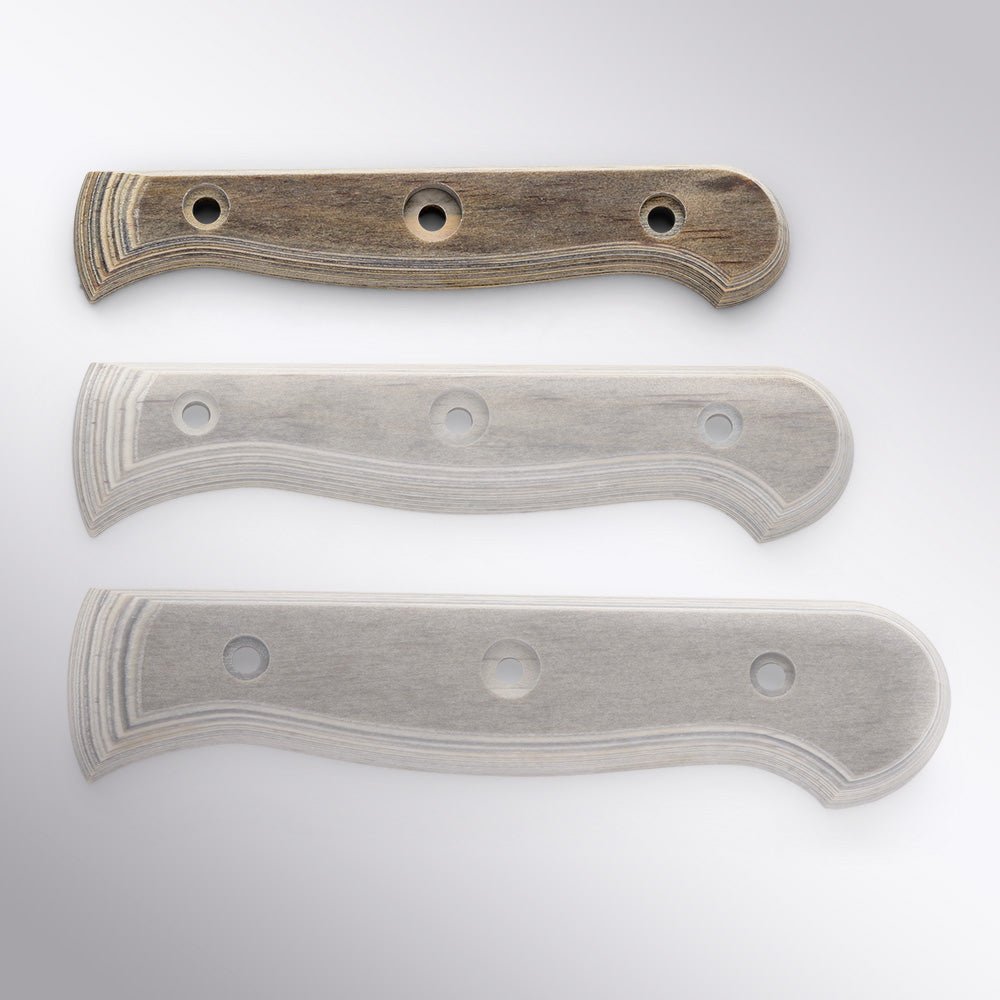
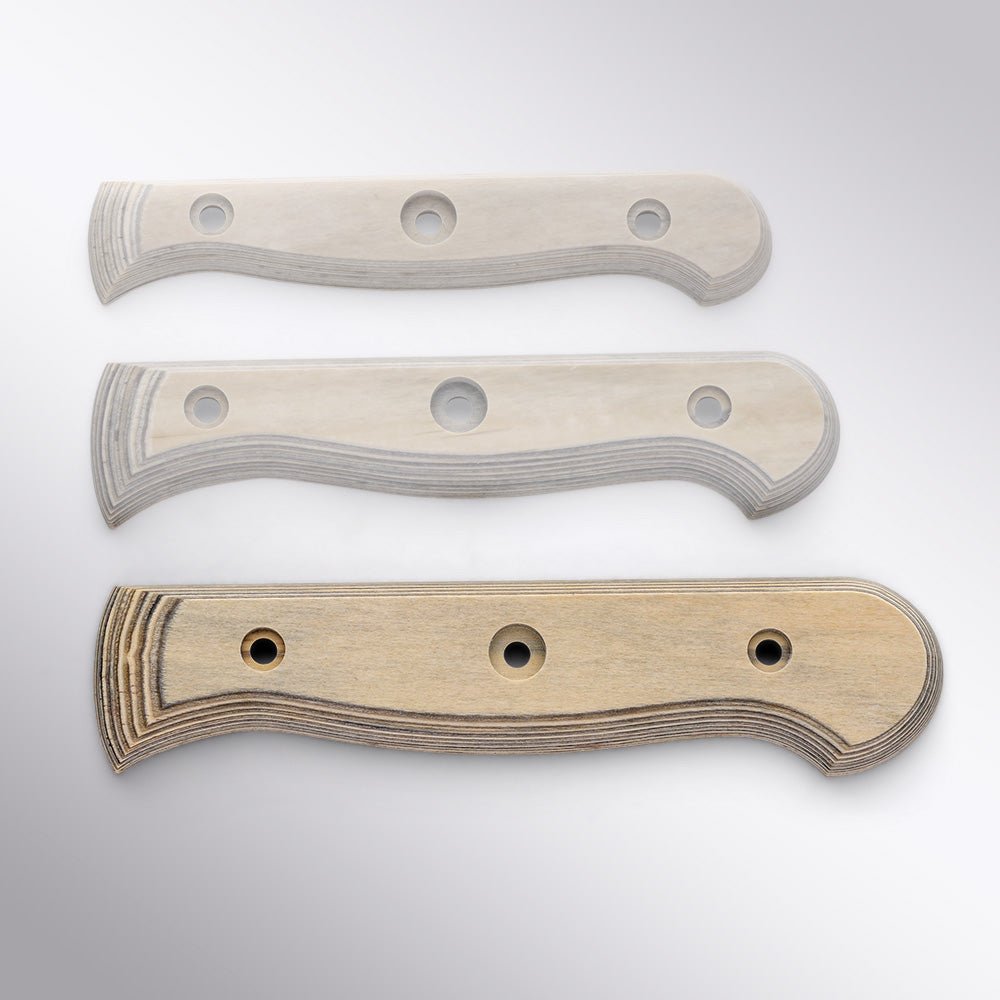
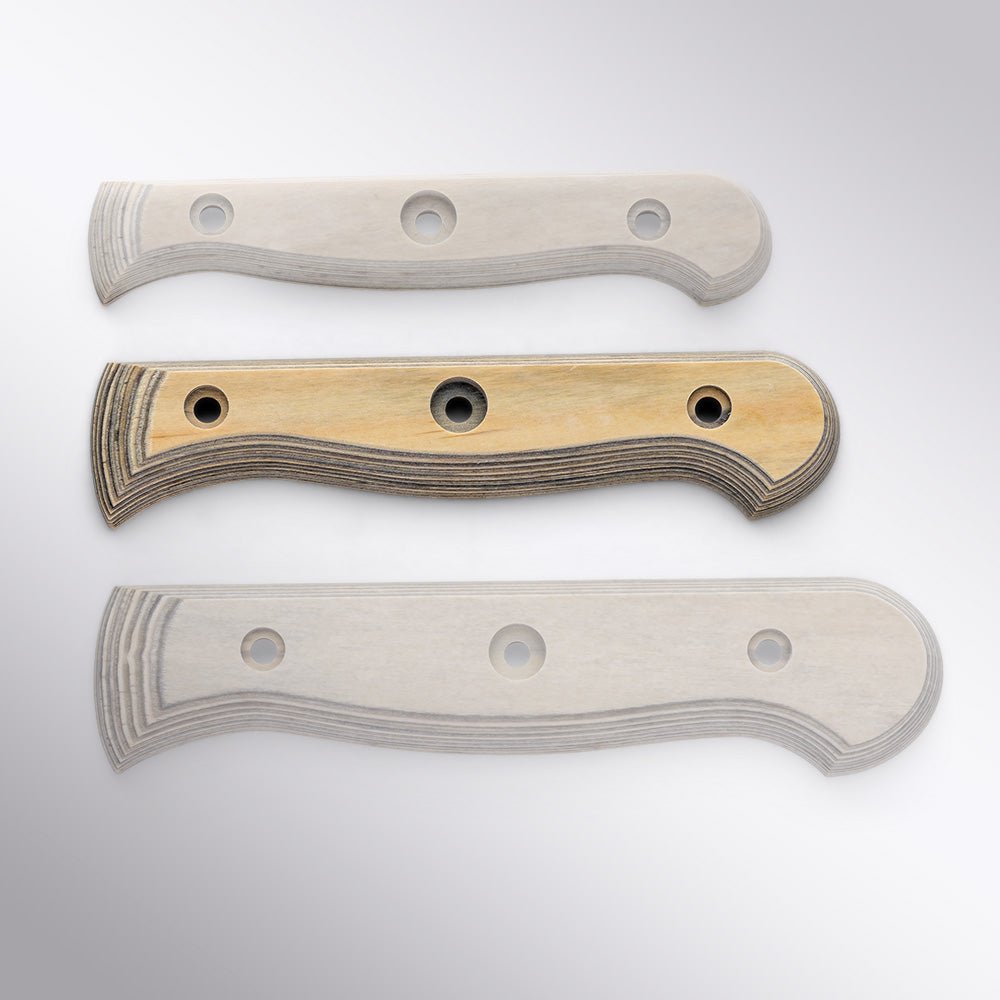

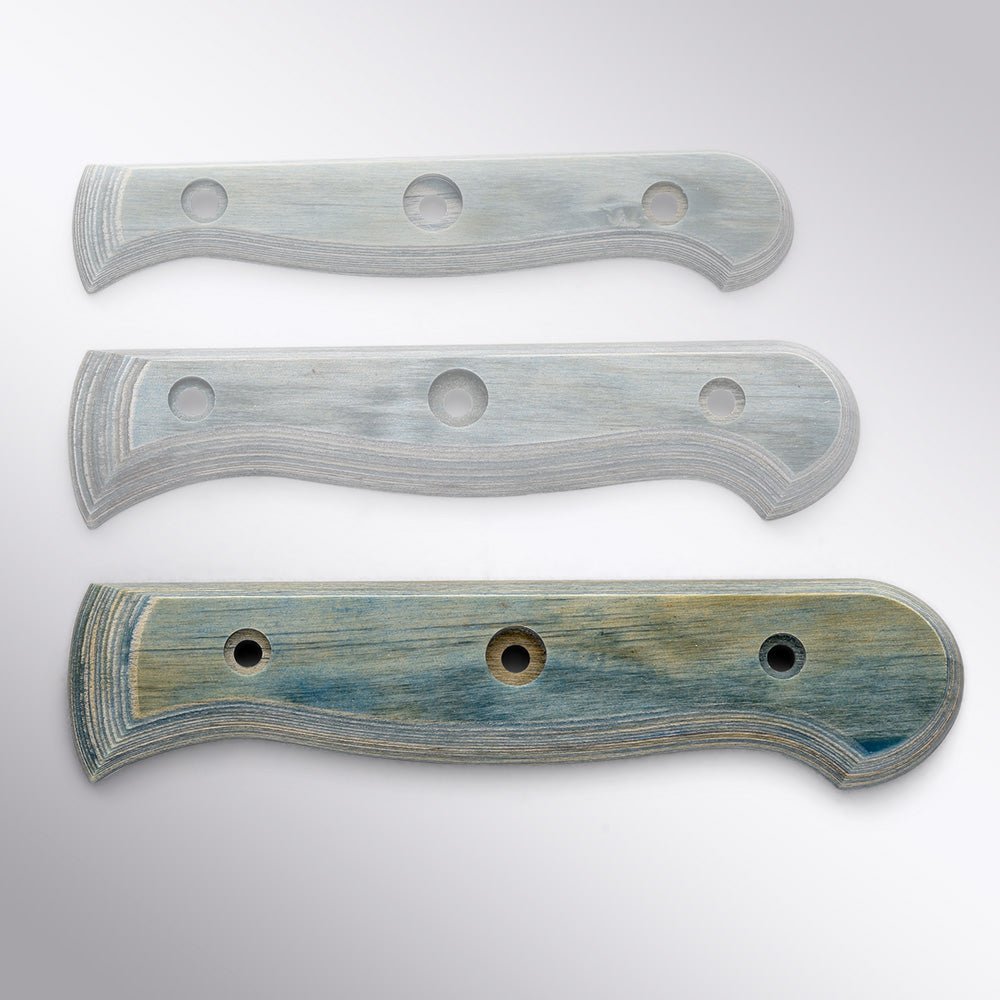
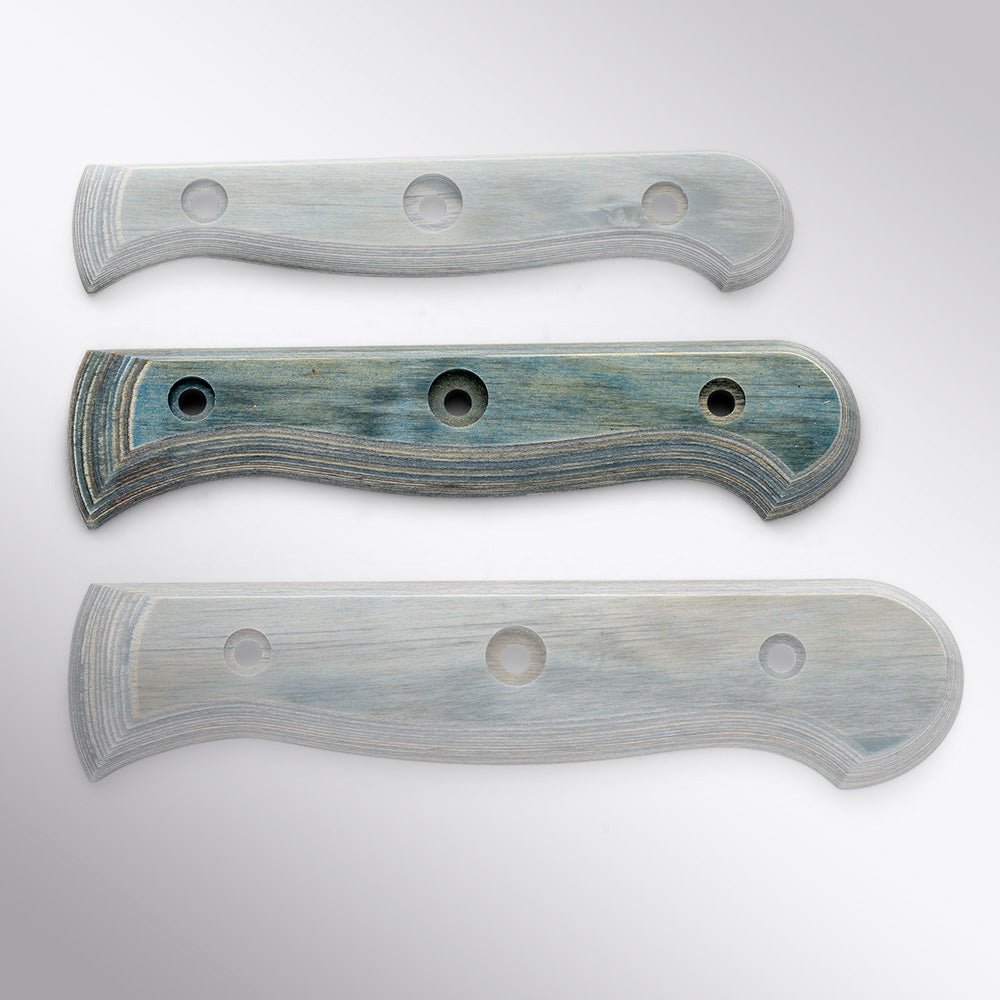

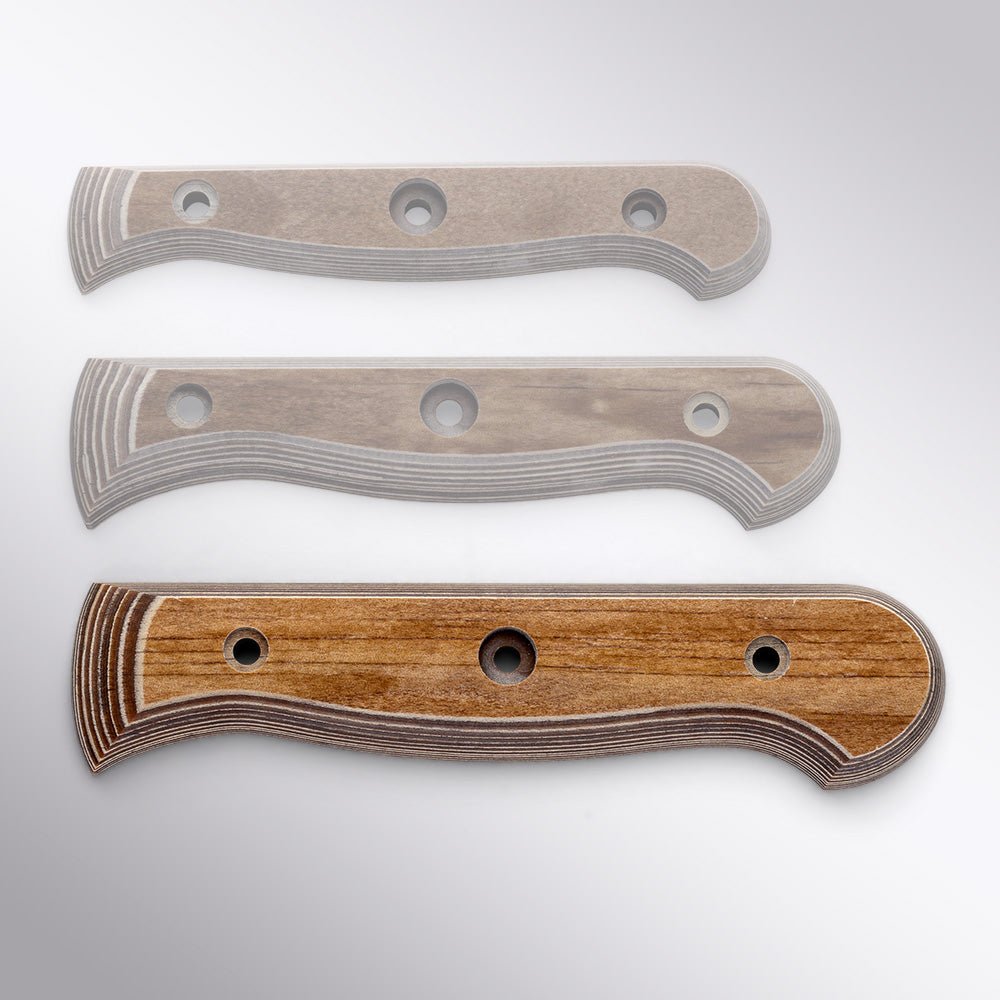

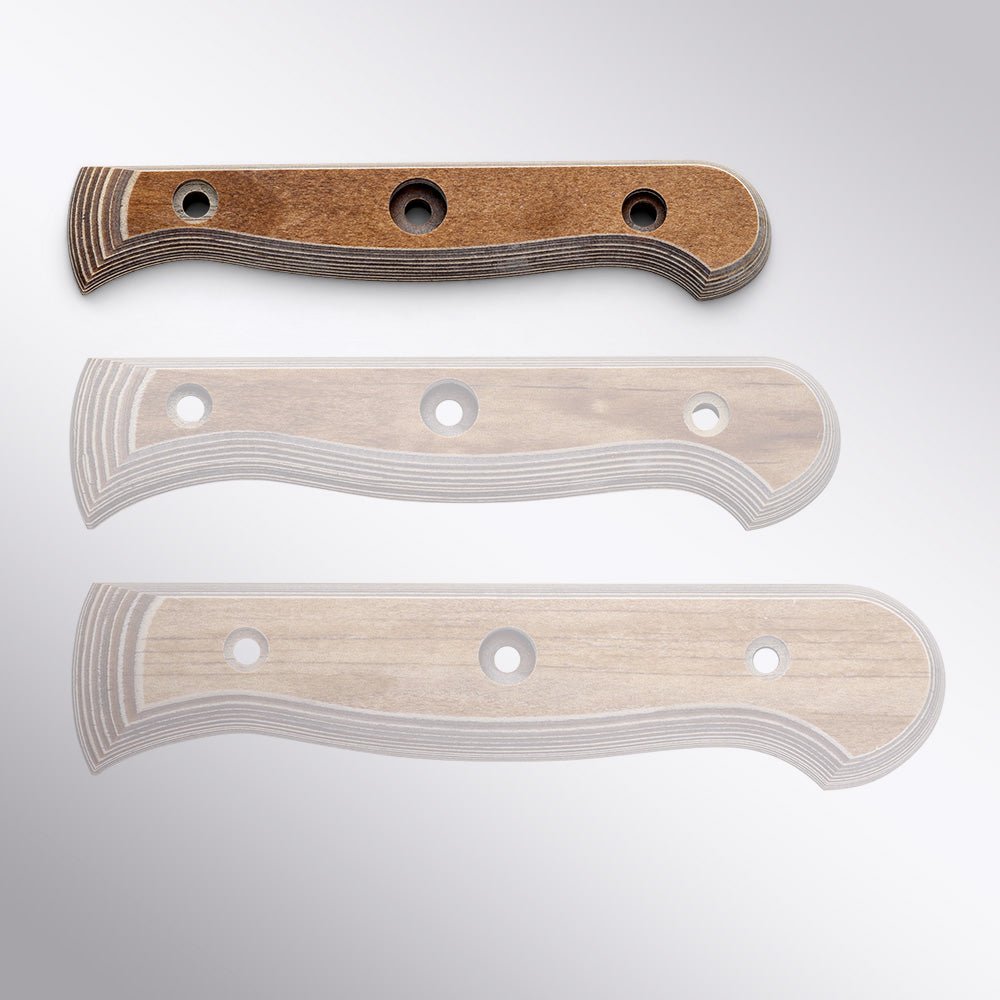
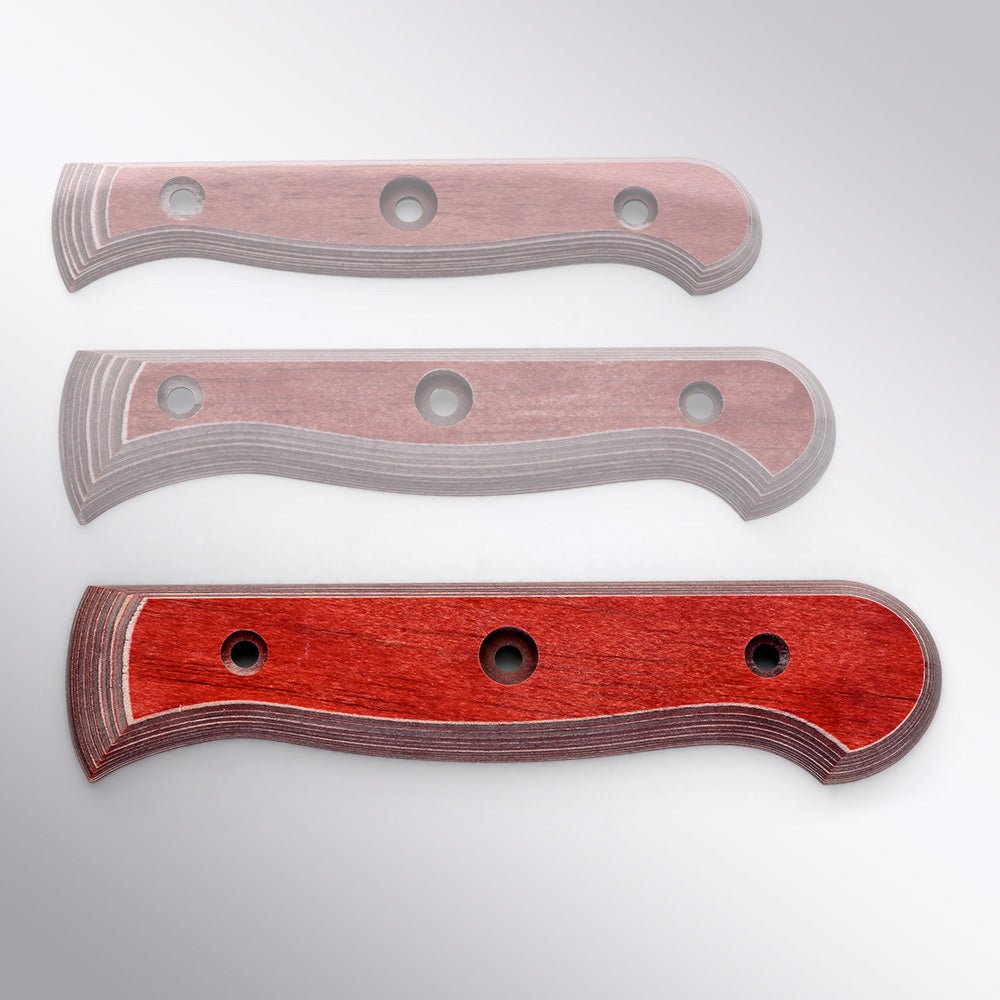
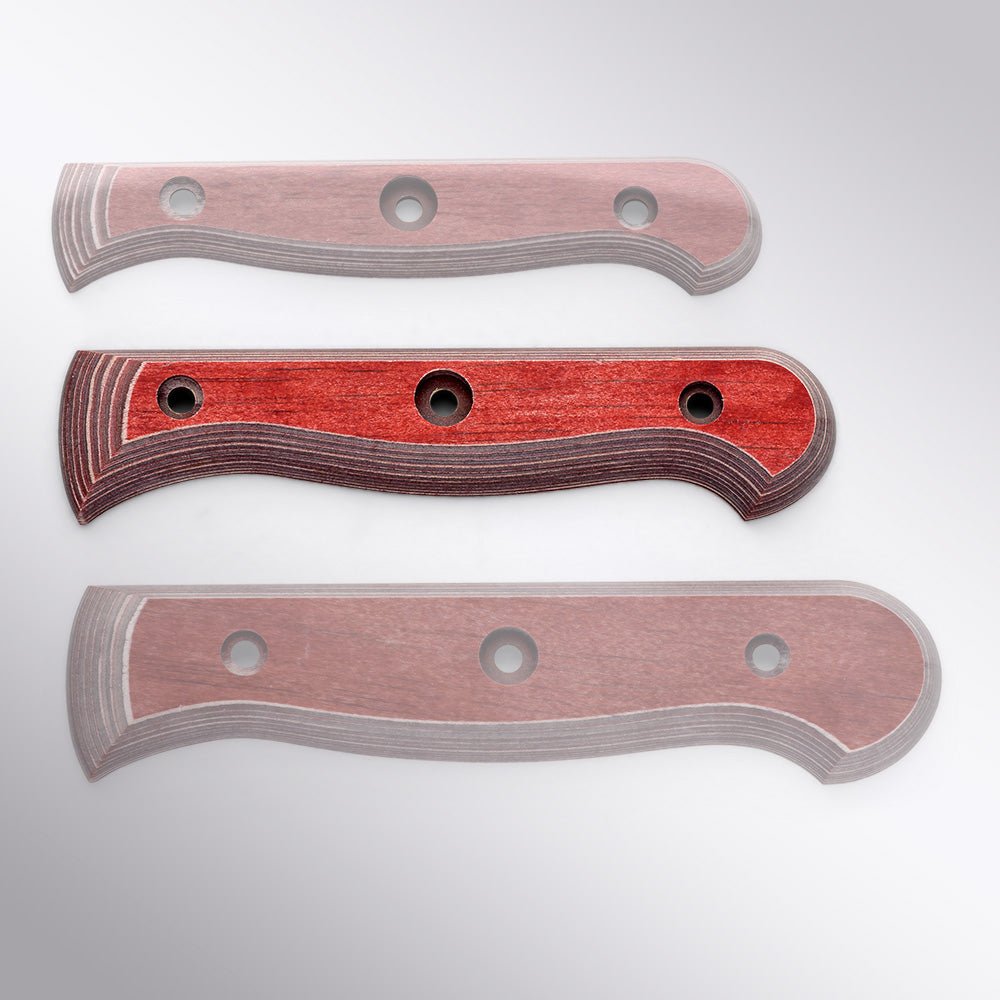
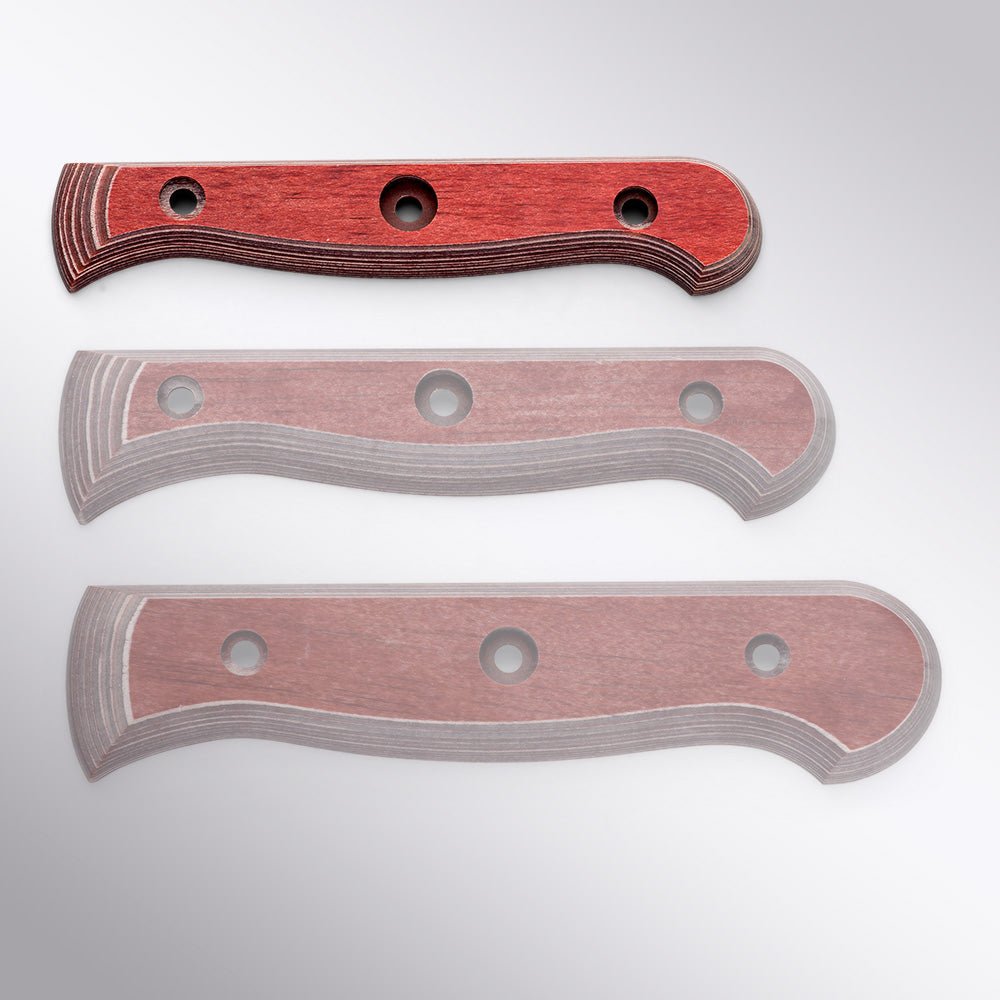

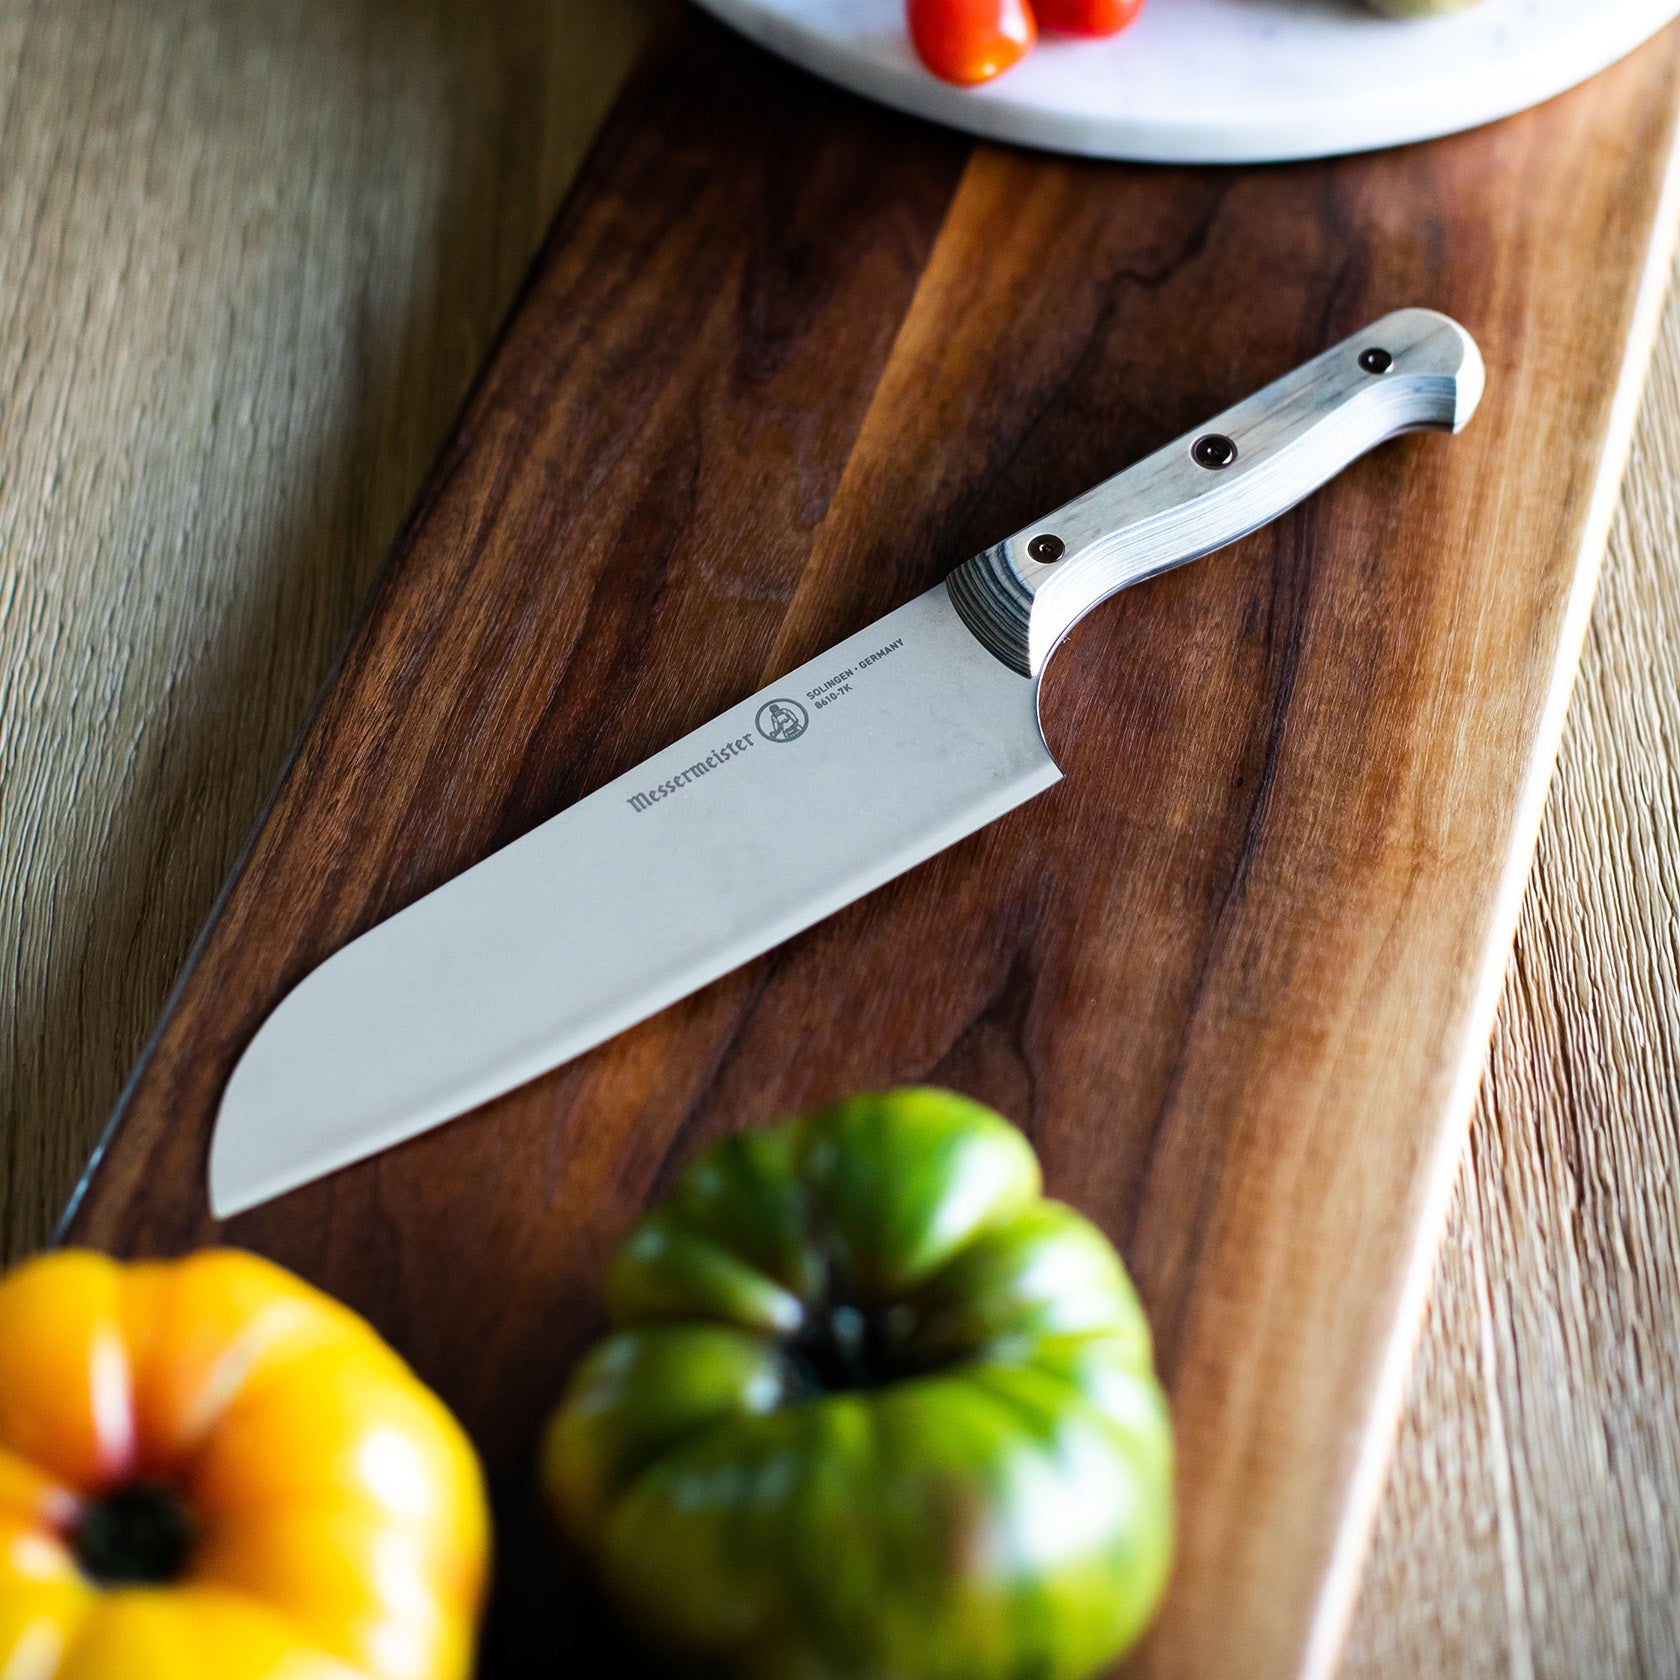
These Mod Kit Handles are exclusively designed for the Messermeister Custom Series knives. Crafted from repurposed wood shavings and bound with natural, non-phenolic resin—free from petrochemicals and formaldehyde-based laminates—this high-quality material offers next-level durability with sustainable origins. Available in five colors and three sizes (Small, Medium, and Large), these handles allow you to customize your Custom Series knife to your liking
HARDWARE NOT INCLUDED - Click HERE to see our Custom Mod Kit Handle Hardware
The small mod kit handle fits ONLY the following Messermeister Custom Series knives:
- Custom 6" Utility Knife
- Custom 5” Cheese & Tomato Knife
- Custom 4.5" Fine Edge Steak Knife
- Custom 3.5" Paring Knife
The medium mod kit handle fits ONLY the following Messermeister Custom Series knives:
- Custom 7" Kullenschliff Santoku
- Custom 6.5" Nakiri
The large mod kit handle fits ONLY the following Messermeister Custom Series knives:
- Custom 8" Chef Knife
- Custom 8" Serrated Offset Knife
CUSTOM
Handle & Rivet Changing Instructions
WARNING: Sharp knives can cause serious injury. Handle with extreme caution.
- Changing handles should never be done by anyone under the age of 18.
- Before you begin, you must completely cover the point and sharpened edge of the blade prior to doing ANY work on the
handle. A properly sized Messermeister Edge-Guard is a good option for covering your blade, but a well attached, durable
cardboard sheath will work too.
- Never hold a knife by the blade.
- Make sure that your work area is clear of any obstructions or trip hazards.
- Only use manual hand tools for assembly and disassembly of your handles. Never use electric screwdrivers or drills to
fasten or remove Torx screws as these tools may cause the knife to spin dangerously.
Tools you will need:
- An Edge-Guard or similar device to safely cover the entire blade. - Two, manual multi-bit screwdrivers, with 1/4 inch drive socket.
It is best to firmly clamp the blade into a bench vice with the tip pointing away from you, using wood or cardboard scraps on either side of the blade to keep the jaws of the vice from scratching your blade.
If you do not have a bench vice, place the knife on a clean, flat work surface. Position the knife so that the tip is always pointed away from your body or others working around you.
Remove the existing handle:
- While holding handle of the knife with your free hand, use a manual screwdriver fitted with one of the T-8 Torx bits provided
in your hardware kit to loosen each of the screw heads on one side of the handle. Remove the screw by inserting the T-8 Torx bit and turning counter-clockwise. If the screw does not loosen right away, use the second T-8 Torx to hold the opposite-side screw head in place while turning the screw.
- When all of the screws are completely removed from one side of the handle, the handle scales and remaining half of the Torx rivets will easily come apart.
(Note: You may need to use a small flathead screw diver to gently pry the collars from the center screw holes. In this case, only pry up from the bottom edge inside the screw hole.)
Installing a new handle:
- Insert the female half of the Torx Rivet through the front screw hole of one side of the handle scale, then through the
corresponding front hole in the tang. The screw will extend slightly through the tang.
- While holding the screw in place with your index finger, place the opposite handle scale in place.
- Gently align the male half of the Torx screw through the screw hole on the other side. The screw heads must be exactly
aligned in order to avoid stripping the threads. Start by turning the screw head center-clockwise until you feel the threads align, then lightly turn clockwise using only your fingers until the Torx rivet begins to tighten. The screw head should turn easily until it is seated in place.
- Repeat this process to attach the center and rear Torx Rivets. You will place the metal collars on the center Torx Rivet before inserting it into the screw holes.
- After all three Torx rivets are in place, use a manual multi-bit screwdriver, with the supplied T-8 Torx bits to tighten the screws from either side. Do not over-tighten as the fine threads may become stripped. The Torx Rivets are full fastened when the head is flush with the surface of the handle scale.
If you have any more questions, feel free to reach out to Messermeister customer service team for technical advice at 800.426.5134.
Brand
Messermeister
Title
Messermeister Custom Series Handle Mod Kit Exclusive for Messermeister's Custom Series Knives
Recommended for You
- Choosing a selection results in a full page refresh.
!